Im Netz gibt es viele Anleitungen zum Anschluss eines RFID-Readers an den Raspberry Pi. Hatte auch noch einen seit Jahren liegen. Mal eben die 7 Leitungen angeklemmt und getestet. Ja es läuft, es geht aber leider nur der RFID-Tag der dabei lag, die andern 20 die ich noch liegen hatte konnten leider nicht gelesen werden 😉 Sind wohl keine Mifare Tags. Und man muss schon bis auf ein paar cm rangehen, damit er gelesen wird. … „Sciurus vulgaris Besuch in der 3. Etage oder RFID Tags einlesen mit dem RC-522“ weiterlesen
Arduino: Wie können RFID Tags eingelesen werden?
Wie können RFID-Tags eingelesen werden?
Das geht ganz einfach mit einem Arduino Nano und ein 125 kHz EM4100 RFID card reader module (RDM630 UART) das keine 5 Euro inkl. Versand kostet.
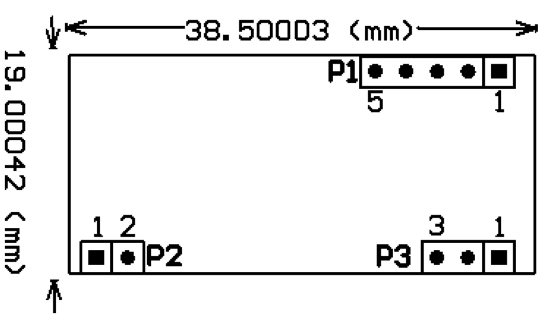
Die Belegung des RFID-Readers:

Die PINs:
|
1 2 3 4 5 6 7 8 9 10 11 12 13 14 15 16 |
1.Pin Definition (WEIGAND26): 2. Pin definition (TTL interface RS232 data format): P1: P1: PIN1 DATA0 PIN1 TX PIN2 DATA1 PIN2 RX PIN3 PIN3 PIN4 GND PIN4 GND PIN5 +5V(DC) PIN5 +5V(DC) P2: P2: PIN1 ANT1 PIN1 ANT1 PIN2 ANT2 PIN2 ANT2 P3: P3: PIN1 LED PIN1 LED PIN2 +5V(DC) PIN2 +5V(DC) PIN3 GND PIN3 GND |
Spec RDM630: Baud Rate: 9600bps,N,8,1, Frequenze: 125 kHz, DC 5V (+-5%), <50 mA, Empfangsbereich: 2 bis 5 cm, Checksum card 10byte Data mit XOR
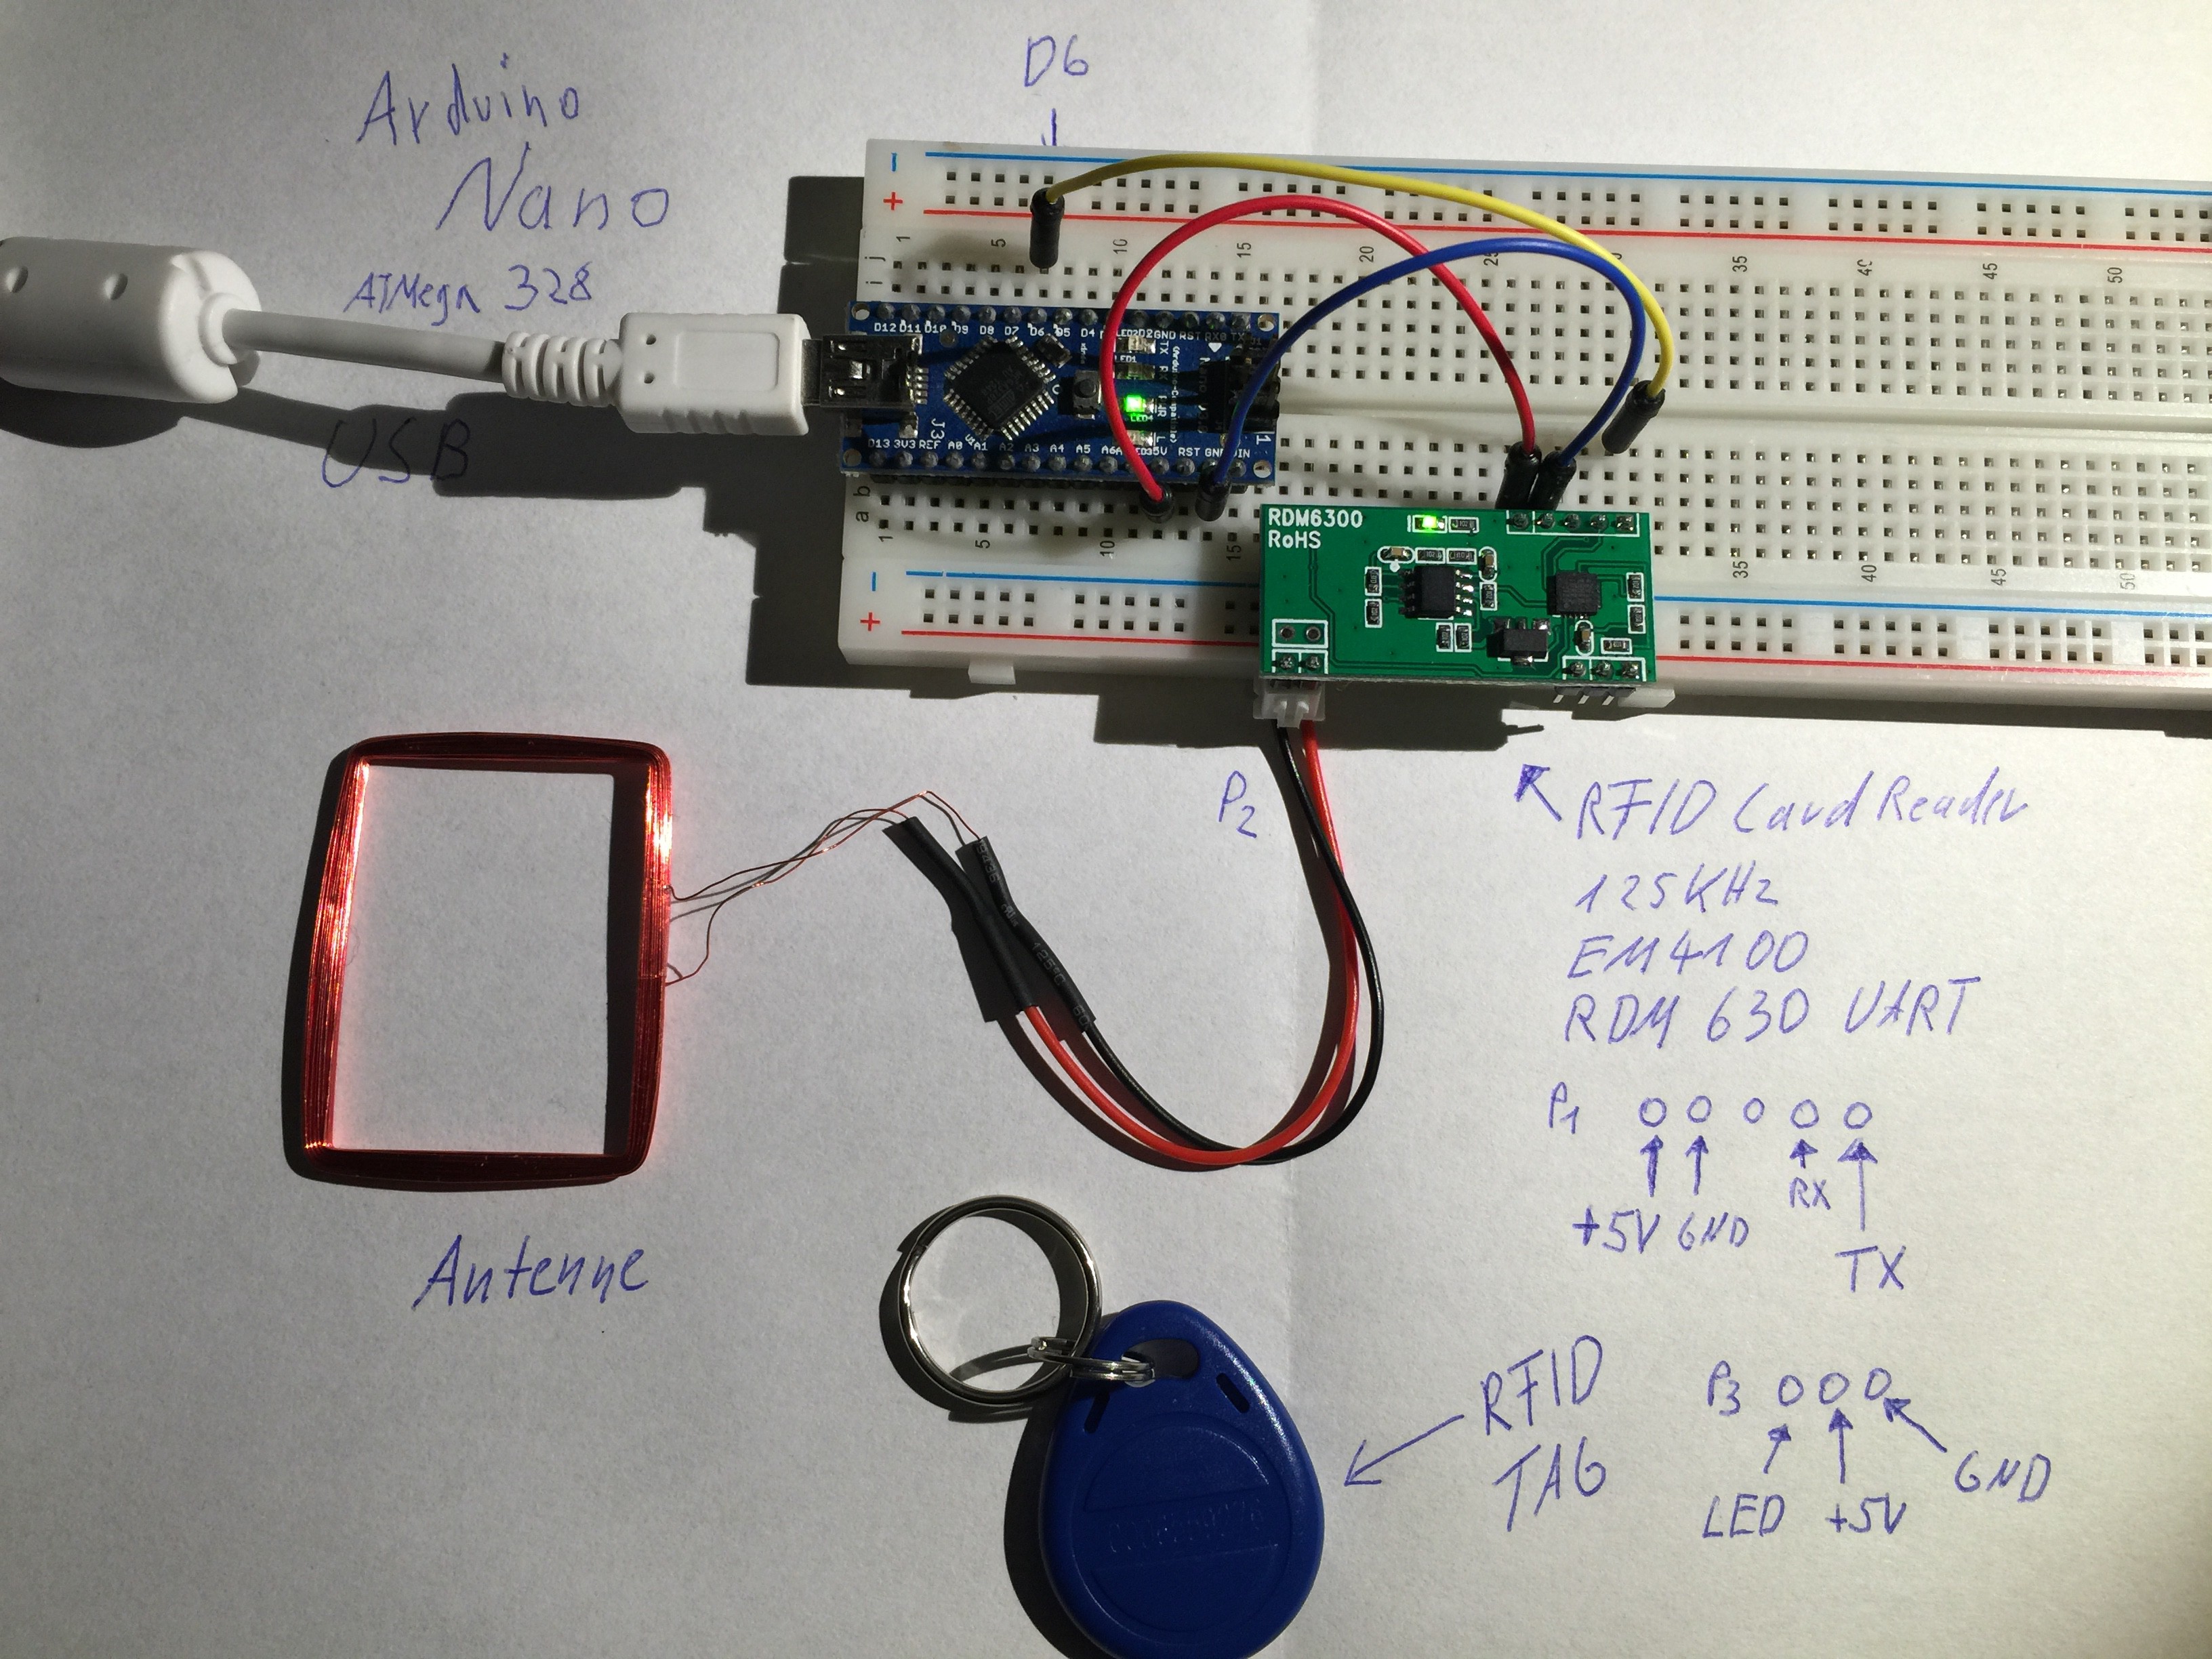
So sieht der Aufbau aus:

Es sind nur 3 Verbindungen zwischen dem Arduino und dem RDM630 nötig und zwar:
|
1 2 3 4 5 |
Arduino Nano: D6 auf PIN 1 des RDM630 (TX) +5v auf PIN 5 des RDM630 (+5 Volt) GND auf PIN 4 des RDM630 (GND) Antenne auf P2 PIN 1 und 2 des RDM630 |
Dann folgende Software RFIDReader.ino auf den Arduino laden, die den Vorteil hat, das die serielle Konsole frei bleibt.
|
1 2 3 4 5 6 7 8 9 10 11 12 13 14 15 16 17 18 19 20 21 22 23 24 25 26 27 28 29 30 31 32 33 34 35 36 37 38 39 40 41 42 43 44 45 46 47 48 49 50 51 52 53 54 55 56 57 58 59 60 61 62 63 64 65 66 67 68 69 70 71 72 73 74 75 76 77 78 79 80 81 82 83 84 85 86 87 88 89 90 91 92 93 94 95 96 97 98 99 100 101 102 103 104 105 106 107 108 109 110 111 112 113 114 115 116 117 118 119 120 121 122 123 124 125 126 127 128 129 130 131 132 133 134 135 136 137 138 139 140 141 142 143 144 145 146 147 148 149 150 151 152 153 154 155 156 157 158 159 160 161 162 163 164 165 166 |
/* RFIDReader Beschreibung: Dieses Programm liesst RFID-Tags von Transponer ein und ueberprueft die Checksumme (XOR) und gibt die Nummer auf der Seriellen-Konsole aus wenn die Nummer erkannt wurde gefolgt von einem OK. Folgende Verbindungen sind noetig: Arduino Nano: D6 auf PIN 1 des RDM630 +5v auf PIN 5 des RDM630 (+5 Volt) GND auf PIN 4 des RDM630 (GND) Antenne auf P2 PIN 1 und 2 des RDM630 Serielle Konsole auf 57000 Baud stellen. Compile mit Arduino 1.5.8 IDE. Einstellung: Board Arduino Nano, Prozessor Arduino ATMega328, Programmer USBtinyISP Der Sketch verwendet 8.216 Bytes (26%) des Programmspeicherplatzes. Das Maximum sind 30.720 Bytes. Globale Variablen verwenden 378 Bytes (18%) des dynamischen Speichers, 1.670 Bytes für lokale Variablen verbleiben. Das Maximum sind 2.048 Bytes. Dieses Programm basiert auf dem Beispielprogramm von maniacbug https://maniacbug.wordpress.com/2011/10/09/125khz-rfid-module-rdm630/ Copyright (C) 2015 Thomas Wenzlaff http://www.wenzlaff.de This program is free software: you can redistribute it and/or modify it under the terms of the GNU General Public License as published by the Free Software Foundation, either version 3 of the License, or (at your option) any later version. This program is distributed in the hope that it will be useful, but WITHOUT ANY WARRANTY; without even the implied warranty of MERCHANTABILITY or FITNESS FOR A PARTICULAR PURPOSE. See the GNU General Public License for more details. You should have received a copy of the GNU General Public License along with this program. If not, see {http://www.gnu.org/licenses/}. */ #include <SoftwareSerial.h> // Pin definitions // Specifies a function to call when an external interrupt occurs. Replaces any previous function that was attached to the interrupt. // Most Arduino boards have two external interrupts: numbers 0 (on digital pin 2) and 1 (on digital pin 3). // The Arduino Mega has an additional four: numbers 2 (pin 21), 3 (pin 20), 4 (pin 19), and 5 (pin 18). const int rfid_irq = 0; // PIN 6 ist auf dem Nano der D6 oder der Pin 9 von rechts, wenn die Stecker rechts liegen const int rfid_tx_pin = 6; // RX wird nicht benoetigt const int rfid_rx_pin = 7; // Untertrueckung von Rauschen bzw. leer Ausgaben, evl. aendern const long LEER = 16843009L; // Baud Rate zum Host PC, evl. aendern const long baudRate = 57600L; // For communication with RFID module SoftwareSerial rfid(rfid_tx_pin, rfid_rx_pin); // Indicates that a reading is now ready for processing volatile bool ready = false; // Buffer to contain the reading from the module uint8_t buffer[14]; uint8_t* buffer_at; uint8_t* buffer_end = buffer + sizeof(buffer); void rfid_read(void); void setup(void) { // Oeffnet die Serielle Verbindung zum Host PC um die Ausgabe der RFID-Tags zu sehen // Geschwindigkeit kann angepasst werden Serial.begin(baudRate); Serial.println("Starte RFID-Reader V. 1.0 von wenzlaff.info"); // Open software serial connection to RFID module pinMode(rfid_tx_pin,INPUT); // muss fest fuer das Modul auf 9600 stehen rfid.begin(9600); Serial.println("OK"); // Listen for interrupt from RFID module. Fallingfor when the pin goes from high to low. attachInterrupt(rfid_irq,rfid_read,FALLING); } void loop(void) { if ( ready ) { // Convert the buffer into a 32-bit value uint32_t result = 0; // Skip the preamble ++buffer_at; // Accumulate the checksum, starting with the first value uint8_t checksum = rfid_get_next(); // We are looking for 4 more values int i = 4; while(i--) { // Grab the next value uint8_t value = rfid_get_next(); // Add it into the result result <<= 8; result |= value; // Xor it into the checksum checksum ^= value; } // Pull out the checksum from the data uint8_t data_checksum = rfid_get_next(); // evl. die Nummer anpassen, oder die if abfrage loeschen if (result != LEER){ if ( checksum == data_checksum ){ Serial.print(result); Serial.println(" OK"); } } // We're done processing, so there is no current value ready = false; } } // Convert the next two chars in the stream into a byte and // return that uint8_t rfid_get_next(void) { // sscanf needs a 2-byte space to put the result but we // only need one byte. uint16_t result; // Working space to assemble each byte static char byte_chars[3]; // Pull out one byte from this position in the stream snprintf(byte_chars,3,"%c%c",buffer_at[0],buffer_at[1]); sscanf(byte_chars,"%x",&result); buffer_at += 2; return static_cast<uint8_t>(result); } void rfid_read(void) { // Only read in values if there is not already a value waiting to be // processed if ( ! ready ) { // Read characters into the buffer until it is full buffer_at = buffer; while ( buffer_at < buffer_end ) *buffer_at++ = rfid.read(); // Reset buffer pointer so it's easy to read out buffer_at = buffer; // Signal that the buffer has data ready ready = true; } } |
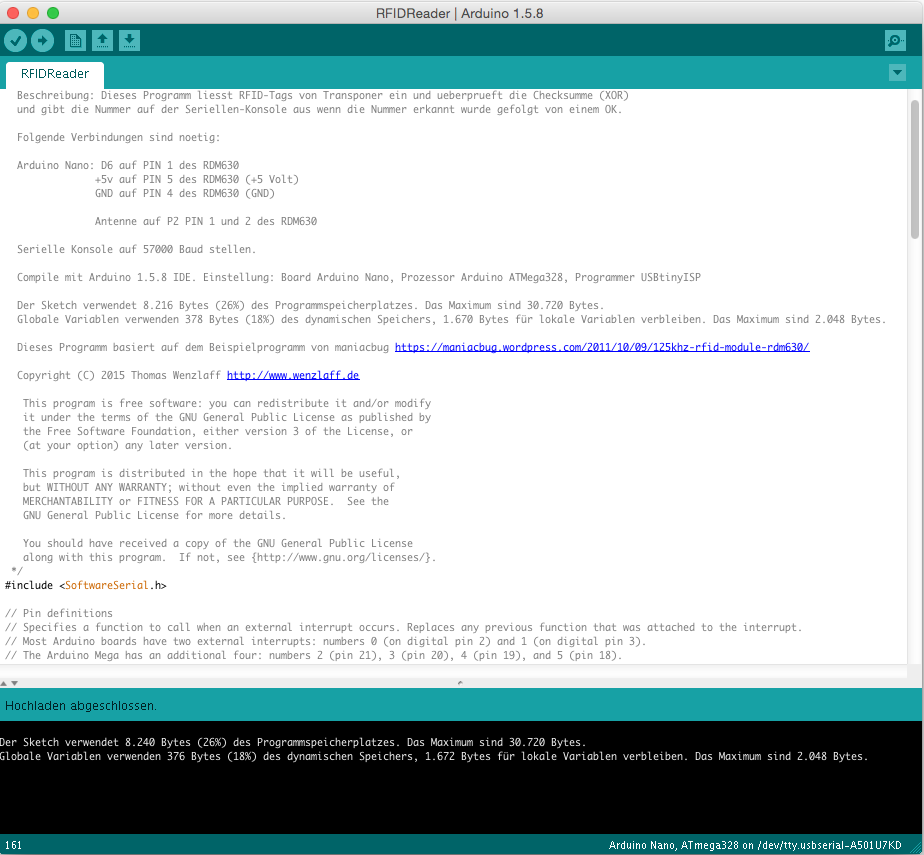
Compile mit der Arduino 1.5.8 IDE.

Einstellung in der IDE:
Board Arduino Nano, Prozessor Arduino ATMega328, Programmer USBtinyISP
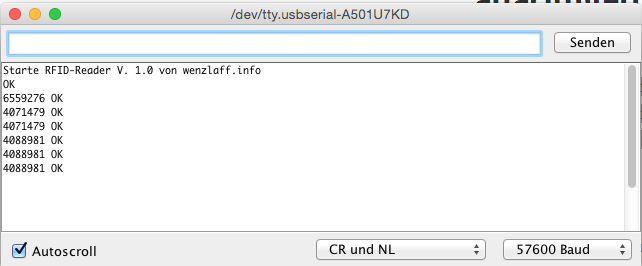
Serielle Konsole auf 57000 Baud stellen
und einen RFID-Tag an die Antenne halten:

Es wird eine Reichweite von ca. 4 cm erreicht. Wenn die Antenne unter der Schreibtischplatte montiert wird, kann der RFID-Tag sicher gelesen werden, wenn der Tag oben drauf liegt (Anwesendheitskennung).
Habt ihr eine Idee, wie die Reichweite vergrößert werden kann?
Oder einen guten Anwendungsfall?

