Es gibt für Arduino eine Kommando Shell mit Namen Bitlash. Auch eine Anleitung ist auf Hompage des Entwicklers zu finden.
Hier die nötigen Schritte, um ein Arduino (Nano) damit zu bestücken.
Zuerst einmal die neueste Version (2.0) von bitlash installieren, dazu in das Libraries Verzeichnis von Arduino wechseln und per git die Neueste Version holen:
cd ~/Documents/Arduino/Libraries

git clone https://github.com/billroy/bitlash.git
oder auch als ZIP und dann auspacken.
Dann die Arduino IDE (1.5.2) starten und über das Menü: Datei-Beispiele-bitlash-Bitlashdemo das Beispiel Sketch laden, compilieren und auf den Arduino hochladen.
Wenn dann der Serielle-Monitor aufgemacht wird, ist es bei mir mit dem Nano abgestürzt.
Deshalb habe ich die Geschwindigkeit auf 9600 geändert. Hier das angepasste Beispiel Sketch:
/**

	twbitlash.pde Thomas Wenzlaff http://www.wenzlaff.de Version 1.0 vom 31.08.2013
Beispiel einen einfachen Kommandointerpreter für den Arduino Nano.
Basis Beispielprogramm von:
Bitlash is a tiny language interpreter that provides a serial port shell environment
for bit banging and hardware hacking.
This is an example demonstrating how to use the Bitlash2 library for Arduino 0015.
Bitlash lives at: http://bitlash.net
The author can be reached at: bill@bitlash.net
Copyright (C) 2008-2012 Bill Roy
Permission is hereby granted, free of charge, to any person
obtaining a copy of this software and associated documentation
files (the "Software"), to deal in the Software without
restriction, including without limitation the rights to use,
copy, modify, merge, publish, distribute, sublicense, and/or sell
copies of the Software, and to permit persons to whom the
Software is furnished to do so, subject to the following
conditions:
The above copyright notice and this permission notice shall be
included in all copies or substantial portions of the Software.
THE SOFTWARE IS PROVIDED "AS IS", WITHOUT WARRANTY OF ANY KIND,
EXPRESS OR IMPLIED, INCLUDING BUT NOT LIMITED TO THE WARRANTIES
OF MERCHANTABILITY, FITNESS FOR A PARTICULAR PURPOSE AND
NONINFRINGEMENT. IN NO EVENT SHALL THE AUTHORS OR COPYRIGHT
HOLDERS BE LIABLE FOR ANY CLAIM, DAMAGES OR OTHER LIABILITY,
WHETHER IN AN ACTION OF CONTRACT, TORT OR OTHERWISE, ARISING
FROM, OUT OF OR IN CONNECTION WITH THE SOFTWARE OR THE USE OR
OTHER DEALINGS IN THE SOFTWARE.
**/
#include "bitlash.h"
void setup(void) {
// Initialisierung und setzen der Baud Rate 57000 bricht beim Nano ab
// Startet den Kommandozeileninterpreter und führt den startup Makro aus
initBitlash(9600);
}
void loop(void) {
runBitlash();
}
und dann läuft dieses Beispiel.
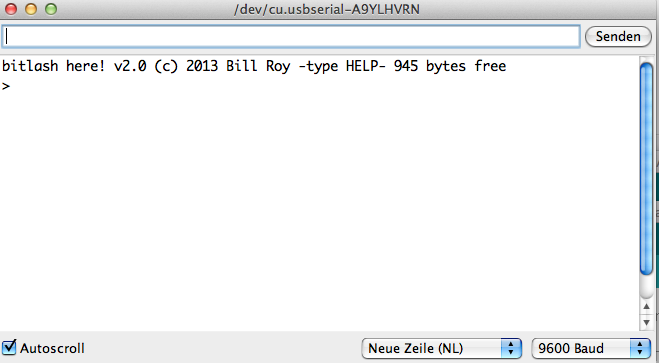
Nach öffnen des Seriellen Monitors in der IDE (1.5.2) erscheint:

Alle Kommandos lassen sich mit help anzeigen:

Wie dann die erste Funktion erstellt wird, steht hier.
Kurz, um die LED 13 blinken zu lassen folgende Befehle eingeben:
function toggle13 {d13 = !d13;}

function startup {pinmode(13,1); run toggle13,1000;}

startup

boot
Funktionen lassen sich mit ls anzeigen:

Weitere Doku hier.
