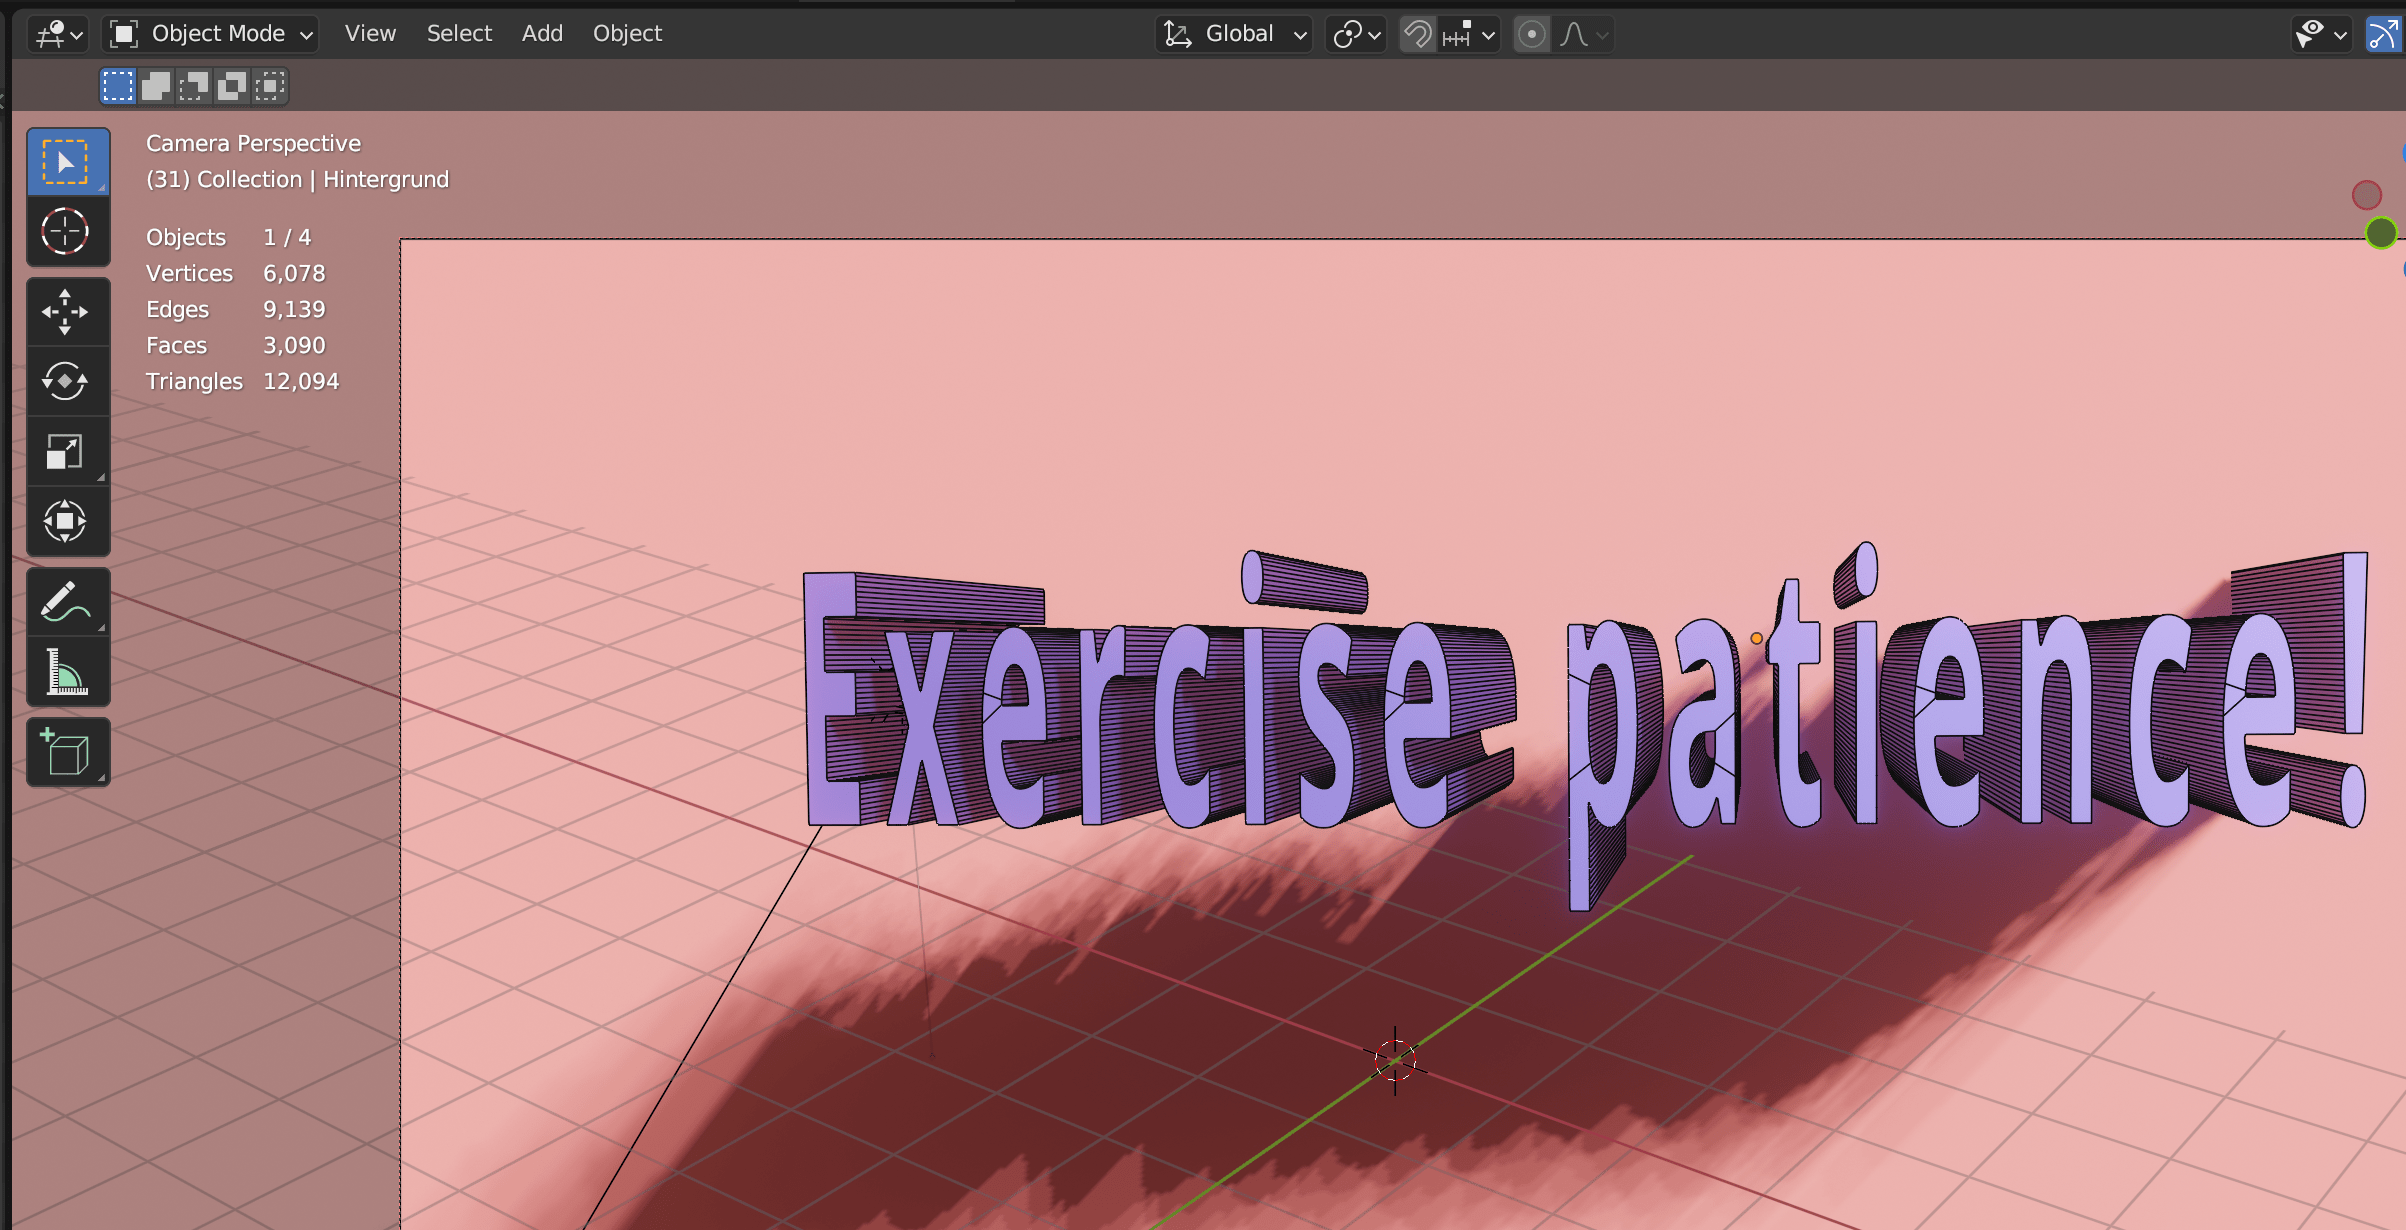
Blender is a powerful 3D software that offers a wide range of tools and features for creating complex 3D models and animations. One of the most recent features added to Blender is GeometryNodes, a powerful tool for creating and manipulating 3D geometry. In this article, we’ll explore how to create a video exercise using GeometryNodes text in Blender, and why patience is key to achieving great results.
What are GeometryNodes?
GeometryNodes is a powerful tool in Blender that allows users to create and manipulate 3D geometry in a more procedural and node-based way. With GeometryNodes, you can create complex geometries, modify and transform them, add effects and animations, and more. It’s a powerful tool for artists, designers, and developers who want to create complex 3D models and animations quickly and easily.
Creating a Video Exercise with GeometryNodes Text in Blender
To create a video exercise with GeometryNodes text in Blender, you’ll need to follow a few simple steps:
Step 1: Create a New Blender Project
First, open Blender and create a new project by clicking on the „File“ menu and selecting „New“. This will create a new Blender project with the default settings.
Step 2: Add Text
Next, add a new text object to your scene by clicking on the „Add“ menu and selecting „Text“. This will add a new text object to your scene, which you can then edit and modify to create your desired text.
Step 3: Convert Text to Geometry
Once you have added your text to your scene, you’ll need to convert it to geometry so that you can use GeometryNodes to modify it. To do this, select your text object and press the „Alt + C“ keys on your keyboard. This will bring up the „Convert To“ menu, where you can select „Mesh from Curve/Meta/Surf/Text“ to convert your text to a mesh.
Step 4: Add GeometryNodes Modifier
Now that you have converted your text to a mesh, you can add a GeometryNodes modifier to it by selecting your mesh and clicking on the „Modifiers“ tab in the Properties panel. From there, click on the „Add Modifier“ button and select „GeometryNodes“ from the list of available modifiers.
Step 5: Use GeometryNodes to Modify Text
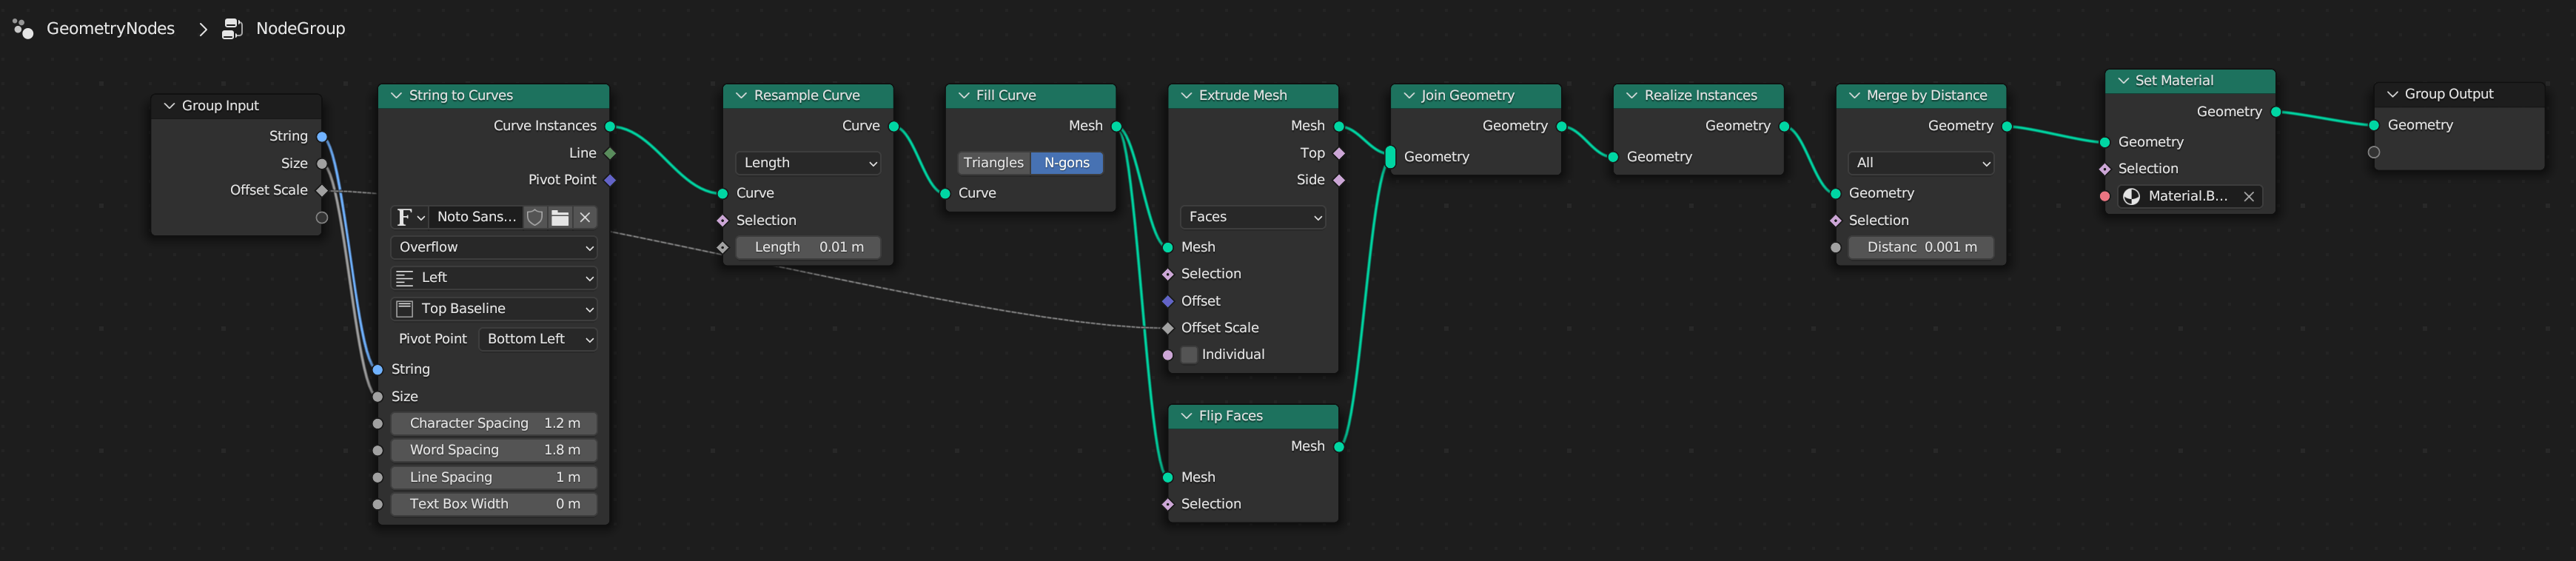
With the GeometryNodes modifier added to your text mesh, you can now use the node editor to modify and manipulate the text in a variety of ways. This is where the patience comes in – experimenting with different nodes and settings can take time, but the results can be impressive.
Some of the things you can do with GeometryNodes include adding textures, modifying shapes, adding deformations, and creating animations. You can also use GeometryNodes to create procedural patterns and effects, such as randomizing the position or rotation of individual letters.
Step 6: Animate Your Text
Once you have created your desired text and modified it with GeometryNodes, you can animate it to create a video exercise. This can involve creating a camera path and animating the camera to follow the text, or animating the text itself to move, scale, or rotate in interesting ways.
Conclusion
Creating a video exercise with GeometryNodes text in Blender can be a fun and rewarding process, but it requires patience and experimentation to achieve great results. With GeometryNodes, you can create complex 3D geometries and modify them in a procedural and node-based way, opening up new possibilities for 3D modeling and animation. So why not give it a try? With a little patience and creativity, you can create stunning 3D animations that will amaze and inspire your audience.
Exercise Patience!