XCA kann übrigens auch ohne X-Server verwendet werden um Keys zu erzeugen oder zu analysieren. Es gibt eine gute Commandline API. Hier ein paar Beispiele auf dem Raspberry Pi.

Die Hilfe ist unter
xca –help
zu finden:
|
1 2 3 4 5 6 7 8 9 10 11 12 13 14 15 16 17 18 19 20 21 22 23 24 25 26 27 28 29 30 31 32 33 34 35 36 37 38 39 40 41 42 43 44 45 |
xca --help X Certificate and Key management Version 2.5.3-dev commit: 472d9e722c5f259c4b0651b12d661279ddbb4f9f Usage xca <options> <file-to-import> ... * --crlgen=<ca-identifier> Generate CRL for <ca>. Use the 'name' option to set the internal name of the new CRL. --database=<database> File name (*.xdb) of the SQLite database or a remote database descriptor: [user@host/TYPE:dbname#prefix]. --exit Exit after importing items. --help Print this help and exit. * --hierarchy=<directory> Save OpenSSL index hierarchy in <dir>. * --index=<file> Save OpenSSL index in <file>. * --import Import all provided items into the database. * --import-names A semicolon separated list of names applied to the imported items in the order found in the PEM file and on the commandline. * --issuers Print all known issuer certificates that have an associated private key and the CA basic constraints set to 'true'. * --keygen=<type> Generate a new key and import it into the database. Use the 'name' option to set the internal name of the new key. The <type> parameter has the format: '[RSA|DSA|EC]:[<size>|<curve>]. --list-curves Prints all known Elliptic Curves. * --list-items List all items in the database. * --name=<internal-name> Provides the name of new generated items. An automatic name will be generated if omitted. --no-gui Do not start the GUI. Alternatively set environment variable XCA_NO_GUI=1 or call xca as 'xca-console' symlink. --password=<password> Database password for unlocking the database. --pem Print PEM representation of provided files. Prints only the public part of private keys. --print Print a synopsis of provided files. * --select=<id-list> Selects all items in the comma separated id-list to be shown with 'print', 'text' or 'pem'. --sqlpass=<password> Password to access the remote SQL server. --text Print the content of provided files as OpenSSL does. --verbose Print debug log on stderr. Same as setting XCA_DEBUG=all. See XCA_DEBUG --version Print version information and exit. [*] Needs a database. Either from the commandline or as default database The password options accept the same syntax as openssl does: env:var Obtain the password from the environment variable var. Since the environment of other processes is visible on certain platforms (e.g. ps under certain Unix OSes) this option should be used with caution. fd:number Read the password from the file descriptor number. This can be used to send the data via a pipe for example. file:pathname The first line of pathname is the password. If the same pathname argument is supplied to password and sqlpassword arguments then the first line will be used for both passwords. pathname need not refer to a regular file: it could for example refer to a device or named pipe. pass:password The actual password is password. Since the password is visible to utilities (like 'ps' under Unix) this form should only be used where security is not important. stdin Read the password from standard input. |
Ok, dann mal erst die Version ausgeben
xca –version
|
1 2 3 |
X Certificate and Key management Version 2.5.3-dev commit: 472d9e722c5f259c4b0651b12d661279ddbb4f9f |
Nun wollen wir mal alle Keys auflisten. Dazu brauchen wir auch die Datenbank Datei. Wenn es die DB-Datei noch nicht gibt, wird sie mit ein paar Warnungen angelegt. Ich habe hier aber schon eine mit Namen xca-datenbank-junit-test.xdb
xca –list-items –database=xca-datenbank-junit-test.xdb
|
1 2 3 4 5 6 |
3 XCA Template TW-CA 4 Asymetric Key JUnit-EC-Privater-Key 5 x.509 Certificate junitec 6 Certificate revocation list junitec 7 Asymetric Key JUnitNiscSect571 8 Asymetric Key JUnitEC-NIST-SECG-571 |
Alle Zertifikate die einen privaten Key in der DB haben mit Aussteller ausgeben:
xca –database=xca-datenbank-junit-test.xdb –issuers
z.B.
|
1 |
5 EC junitec |
Jetzt ohne GUI eine secp256k1 Key erzeugen und in die Datenbank speichern:
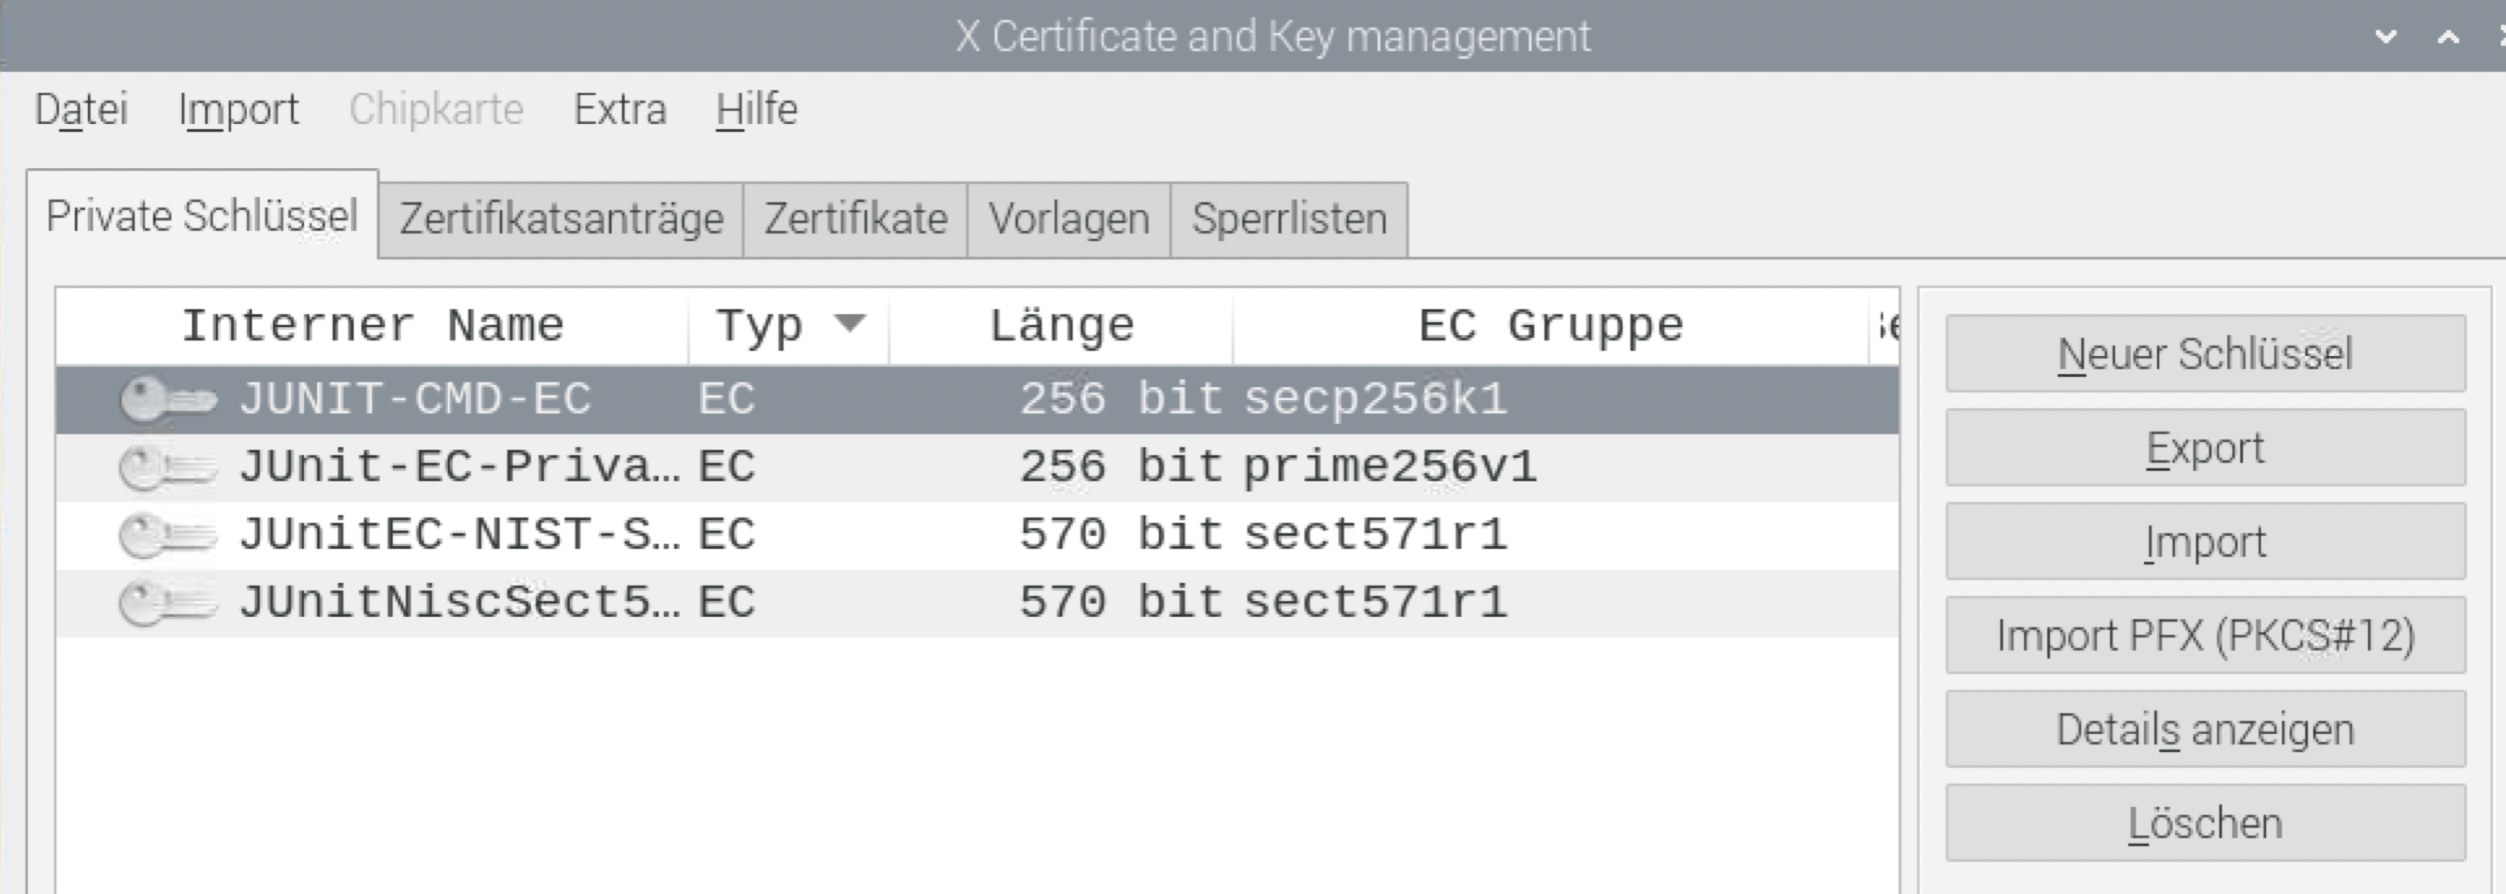
xca –name=JUNIT-CMD-EC –keygen EC:secp256k1 –database=xca-datenbank-junit-test.xdb
Dann noch das Passwort für die DB eingeben:
Please enter the database password for encrypting the key
Password: finished.
Information: Successfully created the EC private key ‚JUNIT-CMD-EC‘
Schon habe wir eine Key mit Namen: ‚JUNIT-CMD-EC‘ erzeugt. In der GUI ist er dann natürlich auch sichtbar:

Ein RSA Key würde so auch leicht gehen:
xca –name=JUNIT-CMD-RSA –keygen RSA:2048 –database=xca-datenbank-junit-test.xdb
Schon vorhandene Zertifikate können auch importiert werden z.B. mit
xca –database=xca-test-db.xdb –no-gui –import junitec.crt
es muss da der –no-gui Parameter gesetzt werden, sonst kommt eine Fehlermeldung „Could not connect to any X display.“.
Zum Schluss, noch ein vorhandenes Zertifikat, den Public-Key aus der Datei junitec.pem ausgeben:
xca –print junitec.pem
|
1 2 3 4 5 6 7 8 9 10 11 12 13 14 15 16 17 18 19 20 21 22 23 24 25 |
File: junitec.pem Type: x.509 Certificate Descriptor: twsoft Subject: emailAddress=... @wenzlaff.de,CN=twsoft,OU=TWSoft,O=TWSoft,L=Langenhagen,ST=Niedersachsen,C=DE Issuer: emailAddress=....@wenzlaff.de,CN=twsoft,OU=TWSoft,O=TWSoft,L=Langenhagen,ST=Niedersachsen,C=DE Serial: A1B93C18A27C10 Not Before: Mittwoch, 20. September 2023 17:56:00 CEST Not After: Dienstag, 20. September 2033 17:56:00 CEST CA: Yes Self signed: Yes Key: EC 256 bit Public key prime256v1 Signature: ecdsa-with-SHA256 Extensions: X509v3 Basic Constraints [critical] CA:TRUE X509v3 Subject Key Identifier 13:38:88:7E:B4:CD:A0:56:06:4D:91:95:D9:D9:75:2B:1F:1F:F8:B8 X509v3 Authority Key Identifier 13:38:88:7E:B4:CD:A0:56:06:4D:91:95:D9:D9:75:2B:1F:1F:F8:B8 X509v3 Key Usage Certificate Sign, CRL Sign Netscape Cert Type SSL CA, S/MIME CA, Object Signing CA Netscape Comment xca certificate |
